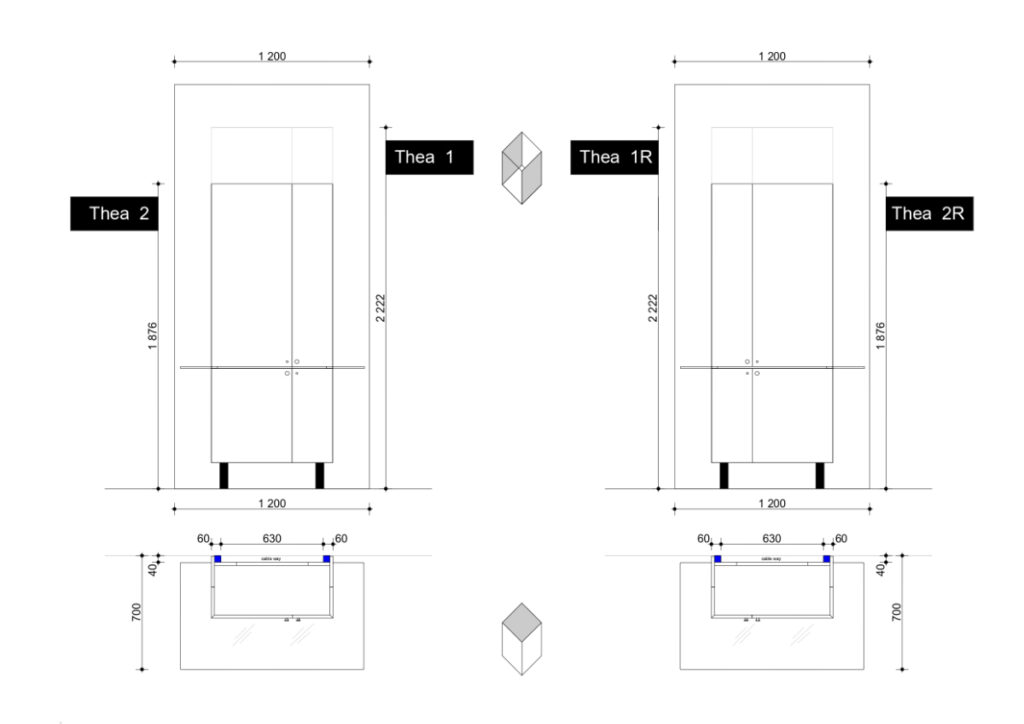
Thea Workspace for Home is designed to be easy to install. We recommend two people to install the furniture. Thea consists of two cabinets and a desk in tempered glass.
Thea stands on her feet and is fixed to the wall using a solid oak supporting structure.
Installing your Thea
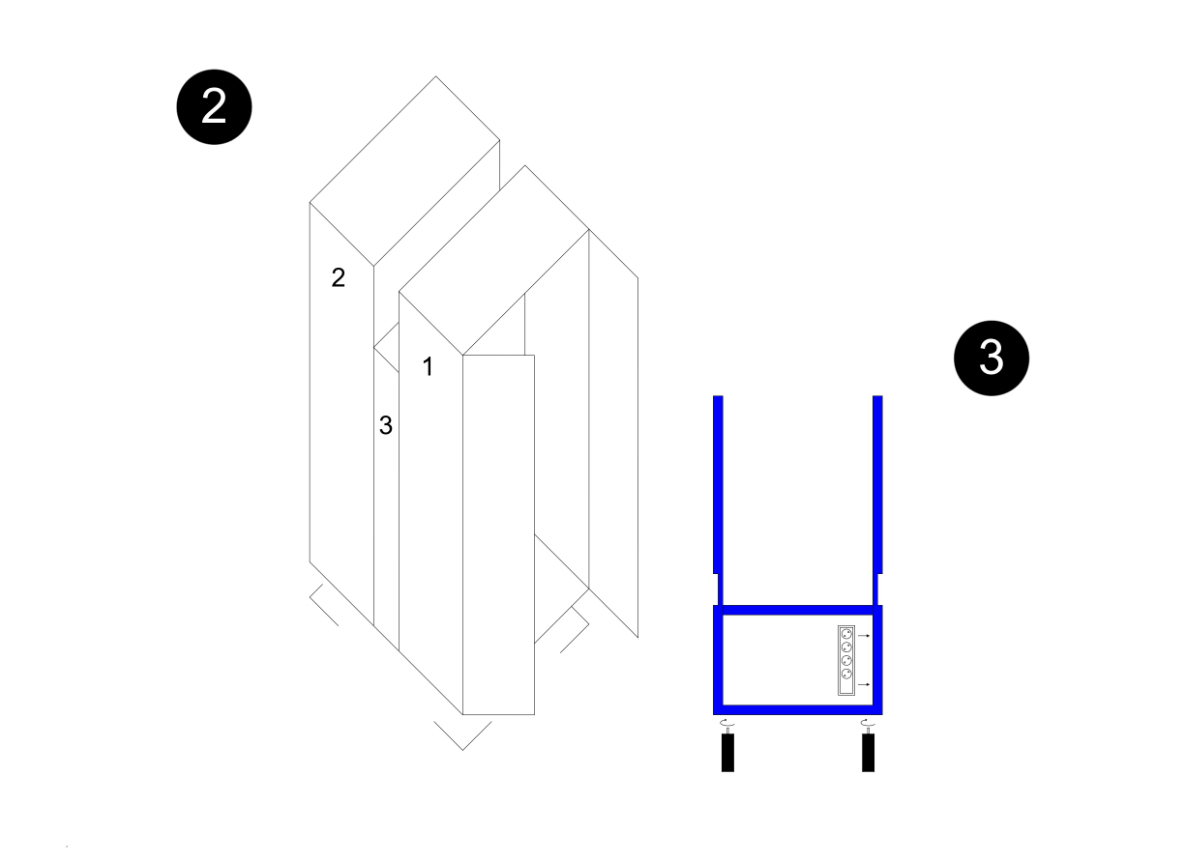
1. Find a place for your Thea
See the gray areas in Figure 1, these are the areas that need to be accommodated on the wall.
Check the height of your floor plinth. If you have a plinth higher than 155 mm, or if there are mirror panels on the wall: read the recommendation at the bottom of this page.
Remember to place Thea next to an electrical outlet.
2. Open packaging
Cut the plastic tape with scissors.
Continue to open the package without tools to avoid scratching the furniture.
Open one package at a time, starting with package 1.
Follow the instructions included in each package.
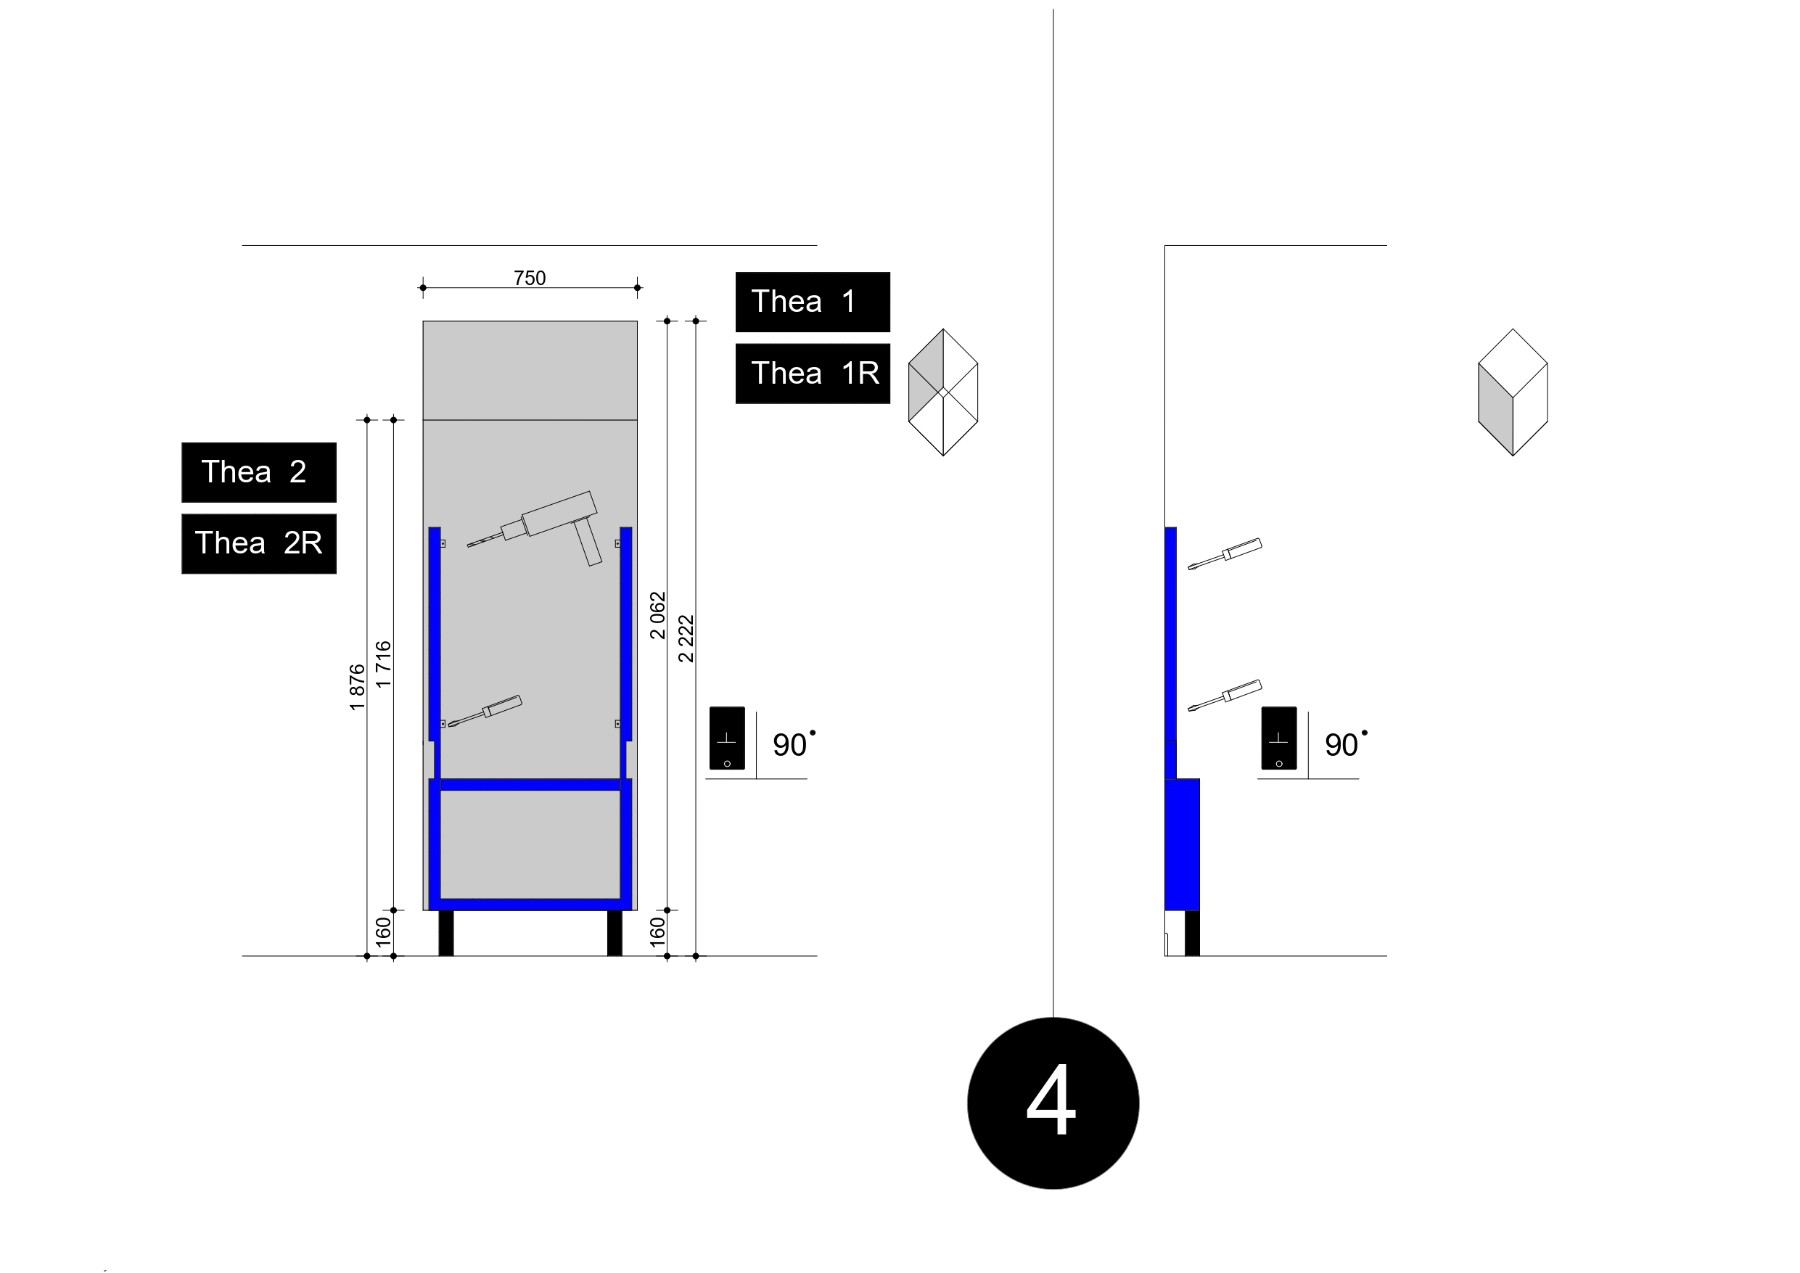
3. Preparing the supporting structure
The supporting structure is shown in blue in Figure 3.
Screw on legs under load-bearing structures. The legs should be fully wrapped in ice.
Check that a grounded branch outlet, 4-way with cable is integrated into the supporting structure.
The electric cable should be placed behind the legs before the supporting structure is fixed to the wall.
Do not plug the power cable into the electrical outlet until the entire installation is complete.
4. Mount the supporting structure on the wall (Weight: 8 Kg)
Screw the four metal angles to the structure.
Hold the supporting structure with mounted legs against the wall to determine placement.
The supporting structure shall be adjusted both vertically and horizontally using a spirit level. You can use the spirit level app on your smartphone. Find the right level using the metal angles and by screwing the legs in the right position. Note – to maintain the stability of the furniture, do not unscrew the legs more than 5 mm.
Mark drill holes on the wall for each metal angle.
Drill the holes, insert plugs and screw the supporting structure with 4 screws. Use appropriate plugs and screws depending on on your wall material. If you are not sure, read our recommendations further down this page.
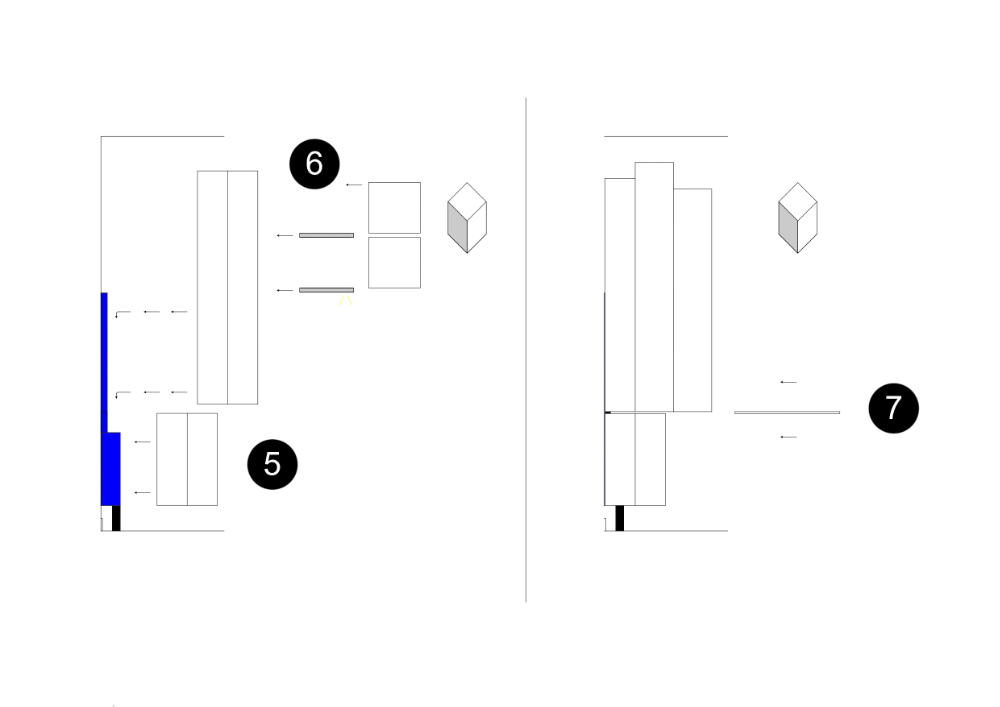
5. Hang the bottom cabinet on the supporting structure (Weight 36 Kg)
Open the bottom cabinet, lift it up and hook it to the supporting structure according to the detailed instructions in the package.
Check that the cable cover in the rear panel is secure.
Close the cabinet.
6. Hang the top cabinet on the supporting structure (Weight 56 Kg – Note that 2 people are required for this).
Open the top cabinet, and with the help of someone, lift it up and hook it to the supporting structure according to the detailed instructions in the package.
Install shelves, starting with the bottom shelf. Switch on the lighting system, if you have chosen interior design 2.
Keep the top cabinet open and screw in knobs on the doors.
7. Attach the glass panel
Slide the glass panel into the gap between the bottom cabinet and the top cabinet. Slide the glass panel all the way into the back panel of the top cabinet.
Attach the glass panel according to the instructions in the package.
Good job!
Recommendations
If you have special details on your walls, such as high plinths, uneven walls, sloping floors, breast panels or mirror panels on the wall. Then you can contact us and we can recommend a professional fitter to help you.
Please note that installation is not included in the price. You can get a quote from the installer.
We use cookies to ensure that we give you the best experience on our website. By continuing to use this website, you agree to the use of cookies. IntegritetspolicyOk